
Services
Seasonal and Recurring Models
The Service in the Control panel is the prime method or creating invoices in SM. https://serviceminder.io/Services
The Help section in SM describes many of the options. Rather that duplicate those notes in this FAQ, it is going to list some common business models in Mosquito Squad with examples for setting up Services to match the model.
Seasonal Service: this model is the most common in Mosquito Squad whereby the client is sold a series of appointments across the season, e.g., 8 treatments from April until October. Once the season begins, sales using this model will reduce the number of treatments based on the date so that if only 4 treatments remain it will offer 4 treatments, priced accordingly.
Click here to view the Services settings for Seasonal Service in SM.
This model should have a Payment Option required setting here: https://serviceminder.io/ControlPanel/ProposalSettings Payment plan options should range from Full (all up front), Payment Plans NOT to extend past the appointment time-frame (e.g., divide total into 3 payments), and Per Treatment treatment (the total divided by the number of treatments invoiced at the completion of each treatment). Here is an example of the Per Treatment Payment Option:
Recurring Service. This is a model used primarily in areas that lack seasonality. It begins service and schedules out five appointments. When one is invoiced it schedules another, always keeping five appointments. Note that from an income statement view point, this model does not book a sale until an appointment is completed. Where this model presents a lower (single) treatment price to a consumer in the proposal, it requires a higher standard of management from a Mosquito Squad office as if paused it must be manually restarted.
Click here to view the Services settings for Recurring Service in SM.
Recurring Services generally use the pay as you go payment option:
In Mosquito Squad, most services are forms of these two.
Additional Notes on Services
A service may be seasonal or recurring (where seasonal has defined start/end dates for each season and recurring just repeats periodically, depending on the recurrence settings until the client cancels). If seasonal, then check the Subscription service checkbox on the service. Otherwise, just schedule as normal but use the recurrence settings for the appointments.
Seasonal services may still auto-renew, assuming you disclose that to your clients and they expect it. You can use the Renew Season function to generate the proposals for the next season. You can also include additional options as part of the renewal to enable the clients to upgrade their service level. Once you are ready to start service delivery for your season, you can then bulk accept all of the proposals for all clients (or only those that are set to auto-renew).
Route Schedules. The primary differentiator for how you'll schedule is whether your service is continuous (so no breaks/seasons) or seasonal (with an off-season period). Continuous delivery indicates using recurring appointments, seasonal indicates using Subscription appointments. Route Schedule: for recurring, seasonal services a route must be established. This is done in the Services section top right. Changes in a route schedule only affect future appointments scheduled. (https://serviceminder.io/routeschedule)
Duration in Services
Duration is initially set at the Service level in the following manner.
- For each service, there is a setting allowing you to 'override duration from' This can be set to override from a contact level custom field. IF this is set and IF there is a value in the field it will be used and will override any other duration
- For each service in the pricing bands you can set duration. if the override is not set (or blank) this is the next value to be used.
- For each service, there is a 'base Duration'. This is used IF there is no value from a pricing band OR from an override.
At each appointment you can edit it and set the duration for that specific appointment.
if you have changed your duration numbers, you can click on the service (not edit) and at the bottom is a link that will allow you to update backlog to update the numbers for all existing appointments.
similar logic applies for parts/add-ons but without the override from a custom field.
Parts/Add-Ons
Parts and Add-Ons are added to modify a service. In SM, an invoice may have only one Service, but may have many Parts. SM cover many aspects of Parts here: https://serviceminder.io/support/index/62 .
When you create an invoice, it may contain those many parts. The parts will not automatically be added to every Appointment created by that invoice, but they may be distributed. Distribution is covered well in the SM documentation here: https://serviceminder.io/support/index/96 These codes are added at the bottom of the part file in the Control Panel>>Parts: https://serviceminder.io/Parts
Parts do not have a setting for 'pro-rating' so no, they won't prorate. that said, there is a way to do what you want IF the part is to be distributed to every appointment.
Part Setup
From the Control Panel, select Parts/Add-Ons. Parts are set up the same whether the build on a service (Add-On with more product or services) or discount a price.
Discounts are parts that affect the price, but not a given appointment. They can be set up with or without pricing bands. Unit Prices are entered as negative.
Parts are items "Added-On" to an invoice to build up the Service.They can be set up with our without pricing bands.
Parts can be priced by property size and distributed. if they are distributed to every appointment, you can set your pricing bands up to make use of a Formula to price it based on the number of appointments being scheduled. The formula would be PricePerAppointment * {stops). so, for example if your part was $25 per appointment for a 1/2 acre or less your pricing band would be
At Least 0 Less Than 0.51 Unit price 0 Formula 25 * {stops} Duration xx Ignore Qty Yes Overage Mode No
if it is a part that is charged per distributed appointment (i.e. you decide on the phone to put it on only x appointments, say 5 of the 10) you will have to price it manually rather than automatically.
Adding Parts After a Sale
Once a sales has been completed, if you need to add parts to that invoice there are four techniques for adding them based on the situation. The first one is best almost all the time.
#1 Adding Parts to when the invoice is unpaid or partially paid. Go to the existing Invoice, edit invoice. 'Click "Edit Lines'
then, edit lines (add parts and verify the money, when you hit save it will automatically adjust the payment plans). Then edit the appropriate appointments, adding the part to the dates you sold, and take money off of the the appointments.
#2 Adding a Part and allowing the system to invoice the cost of that part when the appointment is completed. Edit appointment and add the part with money, and when you complete the appoint it will invoice the $.
#3 Creating a separate invoice. Create a new invoice by clicking “Invoice” in the bottom blue bar (no appointments). Select a service and zero money on the service, but then add the Parts to the invoice with the money. Go to individual appointments and add the service and zero out the money on the Appointments.
#4 Clear out and start over. Write off balance on the invoice, making a note of any payment(s). Then, create a new proposal with a line for previously paid money, e.g, "Paid on invoice 12345 -$154. Include the Add On for all appointments. Build out and accept the new Proposal with the Service and any/all parts you want to add. Schedule the Proposal. This leaves a nice audit trail.
In all cases make extensive contact notes.
Part Assemblies
Part assemblies allow you to define a "bundle" of parts that should be priced as a group. For example, you might have a package offering that includes several other parts (specific quantities as well). Do add a new assembly, just add a new part and check the "Assembly" checkbox. You can then edit the part to add additional parts to the assembly. For each part, you can specify the quantity for that particular assembly. You can also specify that the assembly parts are added with a zero price (instead of whatever the default unit price is).
Discounted First Service in a Subscription Service
Beginning in 2023, Service Minder has been enhanced to allow for a discounted first treatment for a subscription model. It has been available for recurring since about 2021.
Urgency. The First-Discounted-Treatment is designed to drive URGENCY into the sales process. Since we know that the majority of callers are in a position to purchase on the call, the idea is to have your sales team offer a discounted first treatment as a close technique on the first call: "Decide now and I'll discount the first Treatment to $X.00".
Create a Separate Service. To promote this model, it is a best-practice that you create a separate service to be used with NEW Customers. That Service will be labeled something like "Barrier Treatment--First Treatment Discount, New Customers". This is designed to close new folks with an enticing initial offer. It will use this Service, coupled with a Pay-Per-Treatment Payment Option, ONLY.
Use the Service/Pricing Bands and the Payment Option to configure the Discounted First Service in a Subscription Service. One thing to keep in mind is that it'd likely be best to only offer just the one payment plan if you plan to use a service with these settings. The initial pricing will only work if a pay per appointment plan is used.
Step 1: Create the Service: Barrier Treatment--First Treatment Discount, New Customers as a duplicate of your Barrier Treatment.
Step 2: Modify the Pricing Bands to include a price per band for the first treatment. Note: the math works like this: Total Price in the band becomes the first installment, and the remainder divided by the number of treatments the rest. Do the math to make sure you get the result you wish.
To keep the pricing as the season progresses, add a formula like this to the Formula section (below). Adjust the number of stops and price to fit your need. This will override the Price* field.
var stops = {stops}; var stopcount = stops; price = (stops == 1 ? 49 : ( stops == 2 ? 73.50 : ( stops == 3 ? 81.6666667 : (stops == 4 ? 85.75 : (stops == 5 ? 88.20 : (stops == 6 ? 89.8333333 : (stops == 7 ? 91.0 : 91.0 ) ) ) ) ) ) )*stopcount
And add the number of initial treatments at the discounted price below the pricing bands:
Step 3: Create a Pay as You Go Payment Plan, if you don't have one: 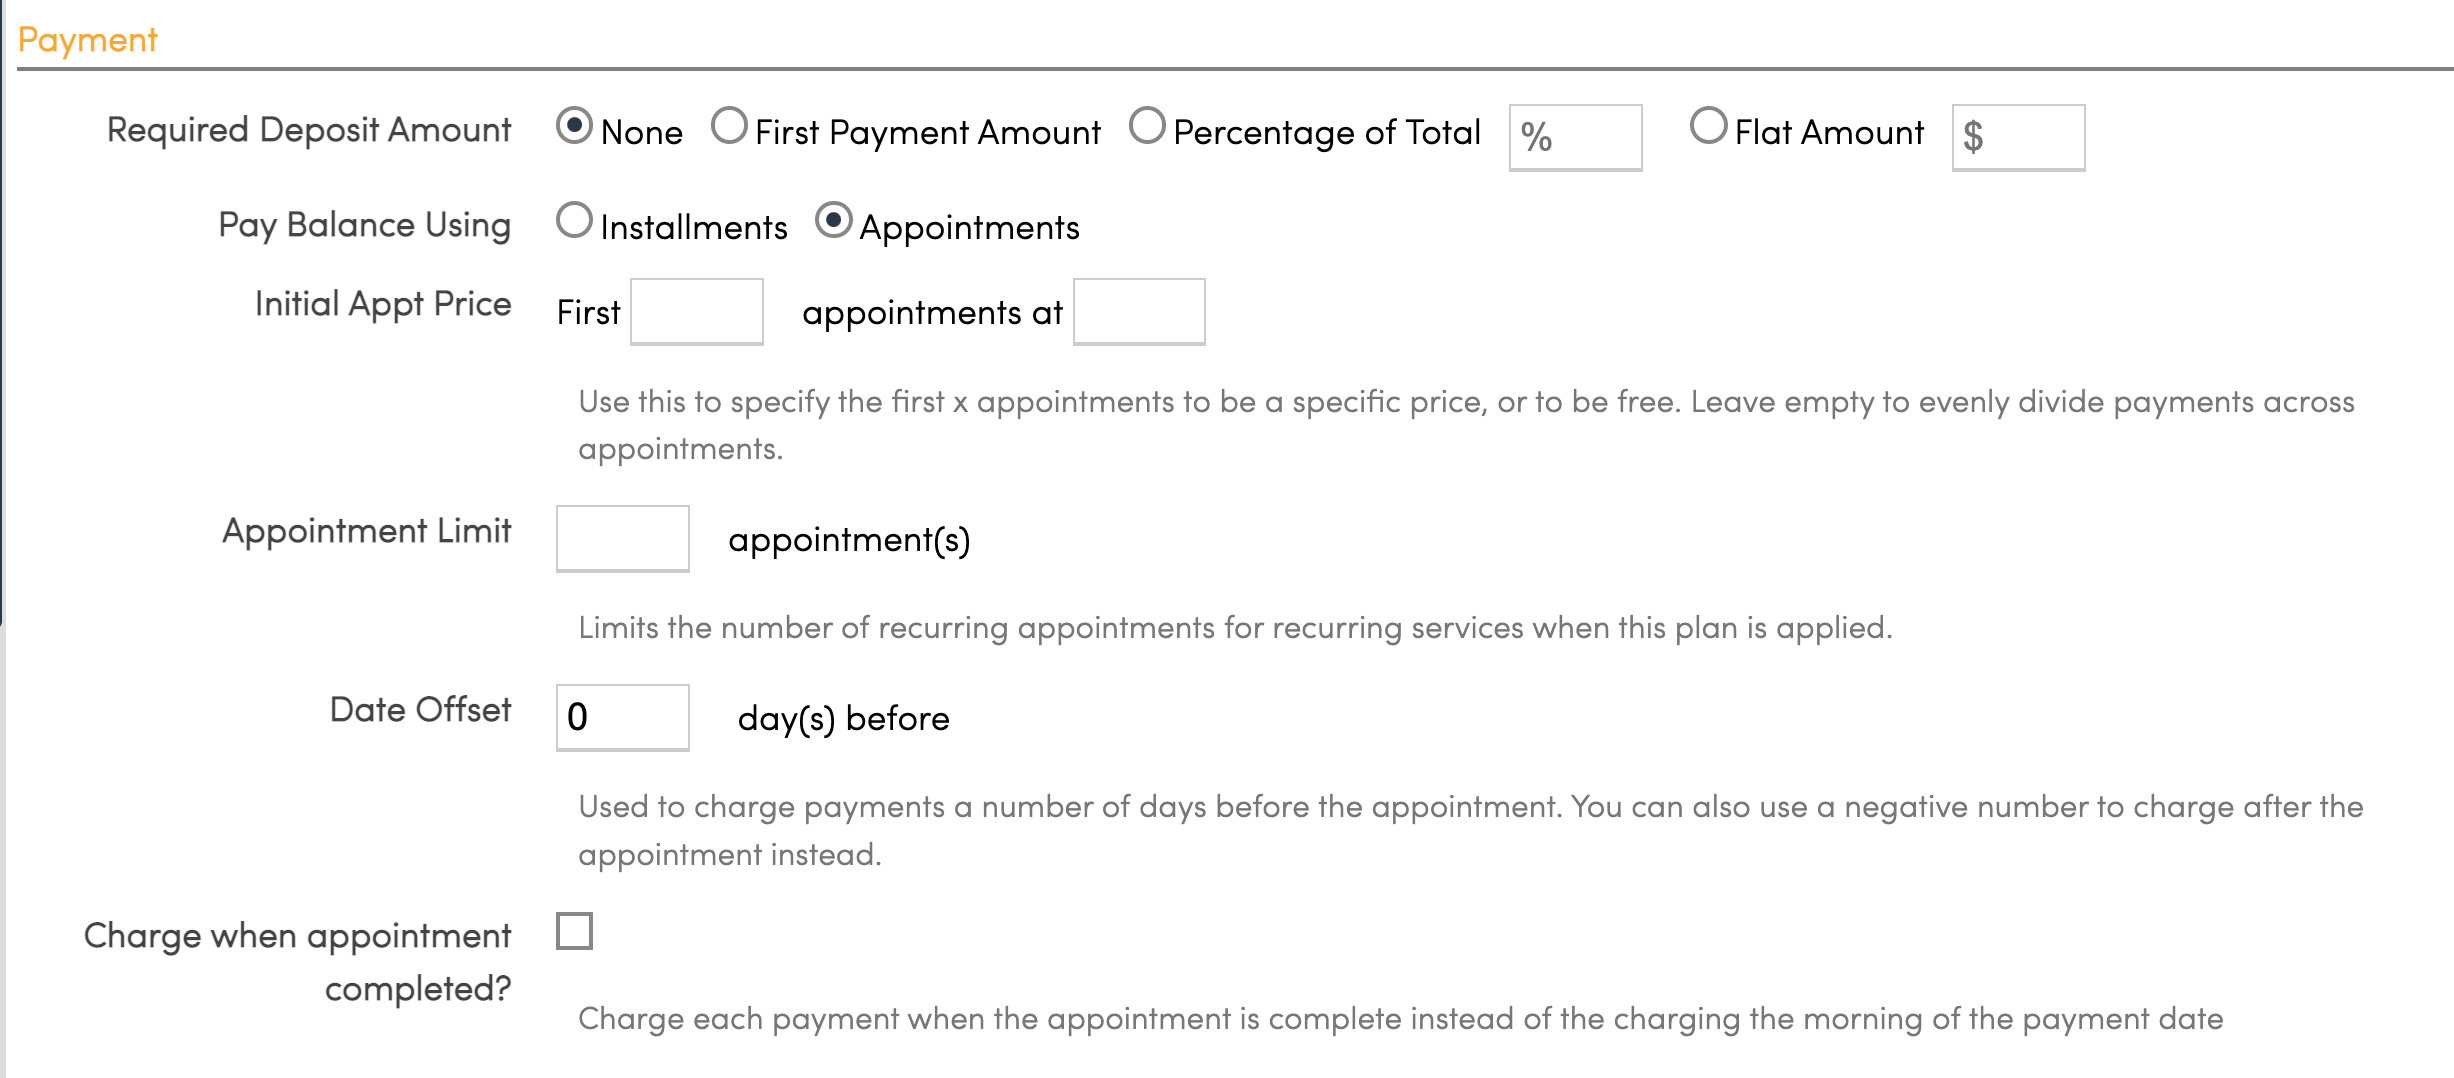
Combine with your Marketing Offer. Make sure to coordinate this offer with your Pay-Per-Click offers with your digital and print vendors.
EXAMPLES OF SETTING UP THE FIRST TREATMENT DISCOUNT PRICING BANDS FORMULA SO THE PRICE WORKS ACROSS THE SEASON:
Calculation for $99 treatment (except first) for up to 11 stops.
| 49 | 1 | 49 | |
| 99 | 2 | 99 | 74.00000000 |
| 99 | 3 | 99 | 82.33333333 |
| 99 | 4 | 99 | 86.50000000 |
| 99 | 5 | 99 | 89.00000000 |
| 99 | 6 | 99 | 90.66666667 |
| 99 | 7 | 99 | 91.85714286 |
| 99 | 8 | 99 | 92.75000000 |
| 99 | 9 | 99 | 93.44444444 |
| 99 | 10 | 99 | 94.00000000 |
| 99 | 11 | 99 | 94.45454545 |
| $ 839.00 | $ 790.00 |
and what goes into the pricing bands for that $99 band:
var stops = {stops}; var stopcount = stops; price = (stops == 1 ? 49
: ( stops == 2 ? 74.00
: ( stops == 3 ? 82.33333333
: (stops == 4 ? 86.50000000
: (stops == 5 ? 89.0000000
: (stops == 6 ? 90.66666667
: (stops == 7 ? 91.85714286
: (stops == 8 ? 92.75000000
: (stops == 9 ? 93.44444444
: (stops == 10 ? 94.00000000
: (stops == 11 ? 94.45454545
: 99.0 ) ) ) ) ))))) ) )*stopcount
That's it. Use this marketing tool to increase your close rate with new leads.
(reviewed 12/24/24)