
Mapping in Service Minder
Mosquito Squad uses Classes/Territories and their mapping to Quickbooks to track sales by Territory, and sales outside of owned Territories. Contacts that fall within an owned zip code are mapped to that Territory. Contacts that are not in any Territory/owned zip code have a 'blank' Territory/Class code. Blank Territories are out-of-territory contacts.
Every organization in Service Minder must have mapping configured, even if there is one owned Territory.
Setting up & Mapping Accouting Classes in Serviceminder (handled at the Brand level)
If there are any issues with the zip code mapping of your accounting classes, or missing zip codes (unlikely), submit a request to David Woodrum via helpdesk@mosquitosquad.co
Mapping in QuickBooks
Setting General Ledger Codes by Service
To check your accounts in QBO you will want to log into QBO and run a P&L to see where your revenue is being allocated. If it is not in the expected income accounts you can change and update by doing the following:
- Click the Gear icon > Products and Services.
- Click Editto the far right of the product or service item you want to edit.
- From the IncomeAccount drop-down list, select the new account (to include, rates, accounts, etc).
- If you want all previous use of the item to be changed, select Also update this account in historical transactions Purchasing Information.(This box becomes available after the Account field is changed.)
If you have already changed the account, but have not changed the past transactions and want them changed:
- Click Gear icon > Products and Services.
- Click Editto the far right of the product or service item you want to edit.
- Select any other account from the Accountdrop-down list.
- Click Save.
- Click Edit
- Change the account back to the correct one.
- Select Also update this account in historical transactions. (This box becomes available after the Income Accountdrop-down is changed.)
- Click Save.
In service minder you will go to the service, click edit, then you will see an income account drop down - from here choose the correct income account to map in QBO - don't forget to click save in SM when making any changes. 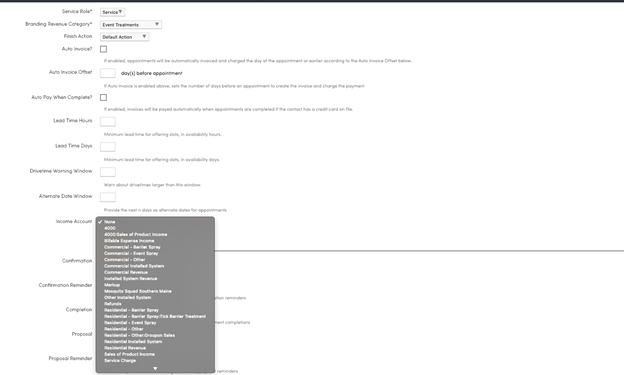
Turning on Classes in QuickBooks Online
- Go to Settings (gear icon) in the top right hand
- Go to Accounts and Settings in the Your Company column of the drop down
- Click on Advanced in the left hand navigation
- Click on
- Check the box for “Tracking Classes”.
- In the Assign Classes drop down select the option “one to entire transaction”.
- Hit
- To get back to the home page click the X in the top right
Adding Classes in QuickBooks Online
- Click on “Settings” (gear icon) in the top right hand
- Click on “all lists” in the List column of the drop down
- Click on “Classes”
- To add a new class, click on “new” in the top right
(you will need to do this for each territory)
Technical Information on how SM syncs with QBO
To elaborate a little bit on how SM syncs with QBO, it use a combination of both name and ID. If you change a unique contact's name in serviceminder, it will first search to see if that new name already exists, since QBO doesn't allow two customers with the same name.
If SM tried to update the contact and that new name already existed somewhere, it would create an error and we wouldn't be able to sync. So if it finds that name already exists, it will use that record instead to sync. If it doesn't exist, SM will then use the ID we had to update and change the name in QBO.
Changing names in service minder shouldn't result in new profiles in QBO as a result. The only way SM creates new profiles is this contact hasn't been synced through us before and the name doesn't match any existing customers.
There are QuickBooks Online tutorials in our training material, and really good and current help via QBO's parent company Intuit online (google them).